A bulb not illuminating? Don’t panic. Kim Henson advises on quick and easy ways to check the system yourself, restore operation and keep your car legal as well as safe…
It’s a fact of life that although motor car bulbs usually last for a very long time (and some modern types have the potential to survive ‘indefinitely’ unless physically damaged), eventually they will fail.
Inevitably this will happen at a time when you least need it, perhaps as dusk is falling and/or when you are about to embark on a long journey at night or when weather conditions and visibility are poor.
There are some cases in which it is advisable to go to a dealer or general garage for assistance – especially when (as mentioned before in these pages) renewing the bulb is a major operation (ridiculously, for changing a safety-related item, components such as bumpers and body panels sometimes have to be removed; you should hear our Grumpy Old Mechanic on this subject!).
There are also (usually rare) instances when the failure of a lamp to illuminate is due to problems within the wiring loom or the switch set-up. However, more often than not the fault lies with the bulb, the bulb holder or the wiring connection, in which case you definitely have a chance of fixing it yourself.
So, as the gloom gathers (metaphorically and in fact!), and (probably) you are short of available time, what can you do to rectify matters so that you can drive the vehicle?
HANDY HANDBOOKS
In my opinion your first port of call should be the vehicle’s handbook. In most cases this will contain basic essential information about the type of bulb being used in each lamp, and how you can reach said bulb.
It’s always worth spending a few minutes reading up about how to correctly and easily remove/disconnect the lamp unit in order to reach the bulb concerned. Usually the lamp assembly can be taken out or the bulb removed very rapidly, using basic tools such as a screwdriver. However, by contrast blundering in with inappropriate tools and excessive force, forcing out the lamp unit (for example) will usually result in damage to the unit and/or the surrounding bodywork, to the extent that you then might not even be able to re-fit the lamp… Note that many lamp unit and associated components are made from fairly brittle plastic; work with care!
In any event before undertaking any dismantling operations, get a new bulb of the correct type, or, ideally, buy a complete set of bulbs for your car, and whenever an individual bulb is used from the set, buy another to replace it, so that you always have a full set available – and keep them in the vehicle.
CORROSION?
When you reach the bulb, examine it with care; you may find that the filament looks intact and in many cases non-operation of the lamp is due to a build-up of moisture/dirt/corrosion between the bulb and its holder.
With the lamps switched off, apply a little ‘maintenance spray’ around the bulb (which may be seized in the holder), then carefully ease it out of its holder (caution in case the glass breaks; grasp with a gloved hand!), and examine the bulb and its holder.
If it is evident that the bulb’s filament has broken, of course a new bulb will be required. However, before fitting this, ensure that the bulb holder’s metallic elements are clean and showing ‘bright metal’ to ensure good electrical continuity.
If both the original bulb and its holder appear to be intact but are suffering from minor corrosion, use abrasive paper (personally I use a fine grit ‘wetordry paper’, lubricated with a little maintenance spray) to clean up the metal section of the bulb and its base contact(s), also the corresponding areas of the bulb holder. On completion, lightly apply the spray to these areas to get rid of any residual dirt/corrosion/abrasive material, then wipe dry with a clean, soft cloth.
Install the bulb, and then, while temporarily holding the lamp unit in position on the vehicle, get an assistant to turn on the affected lamp circuit. Hopefully the bulb will then illuminate and you can re-assemble all components in the reverse order to that used during dismantling.
IT WORKS!
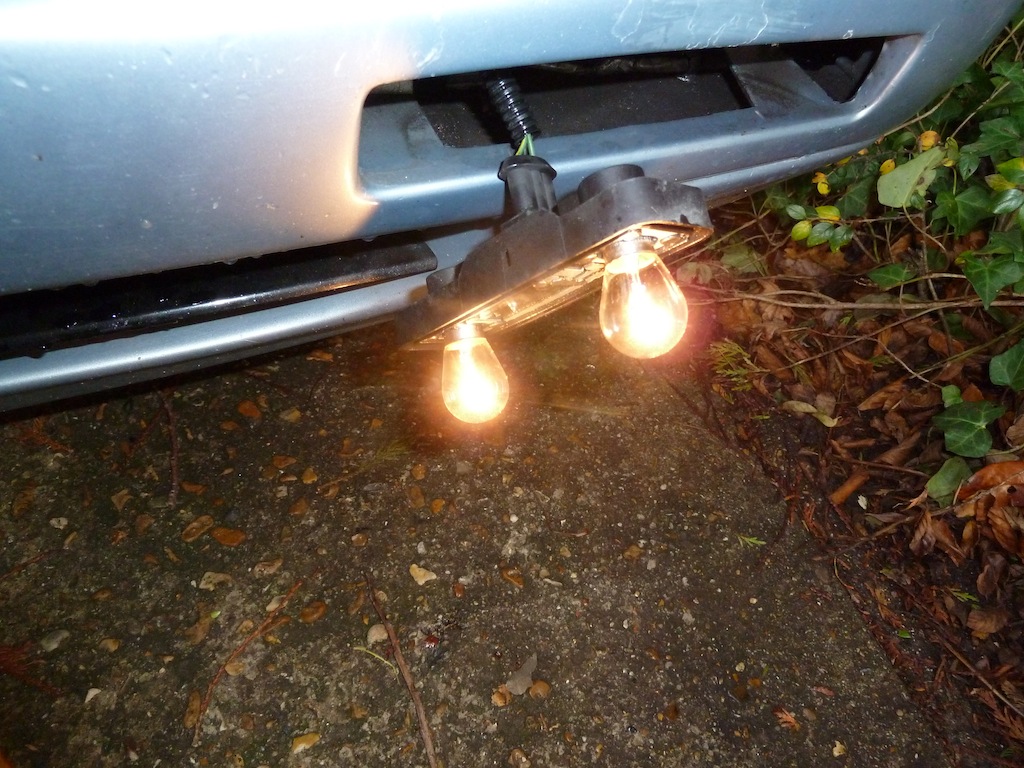
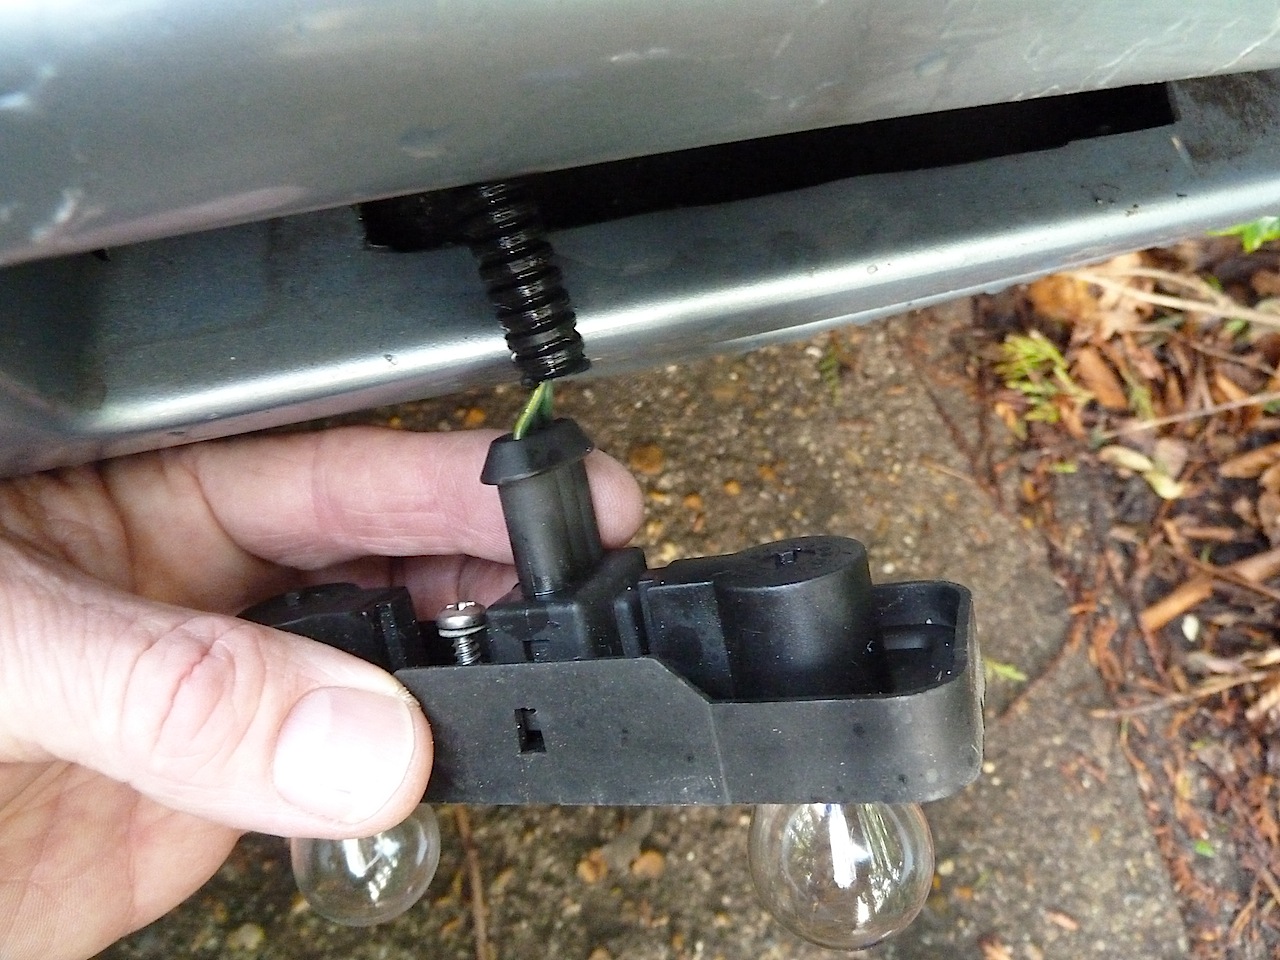
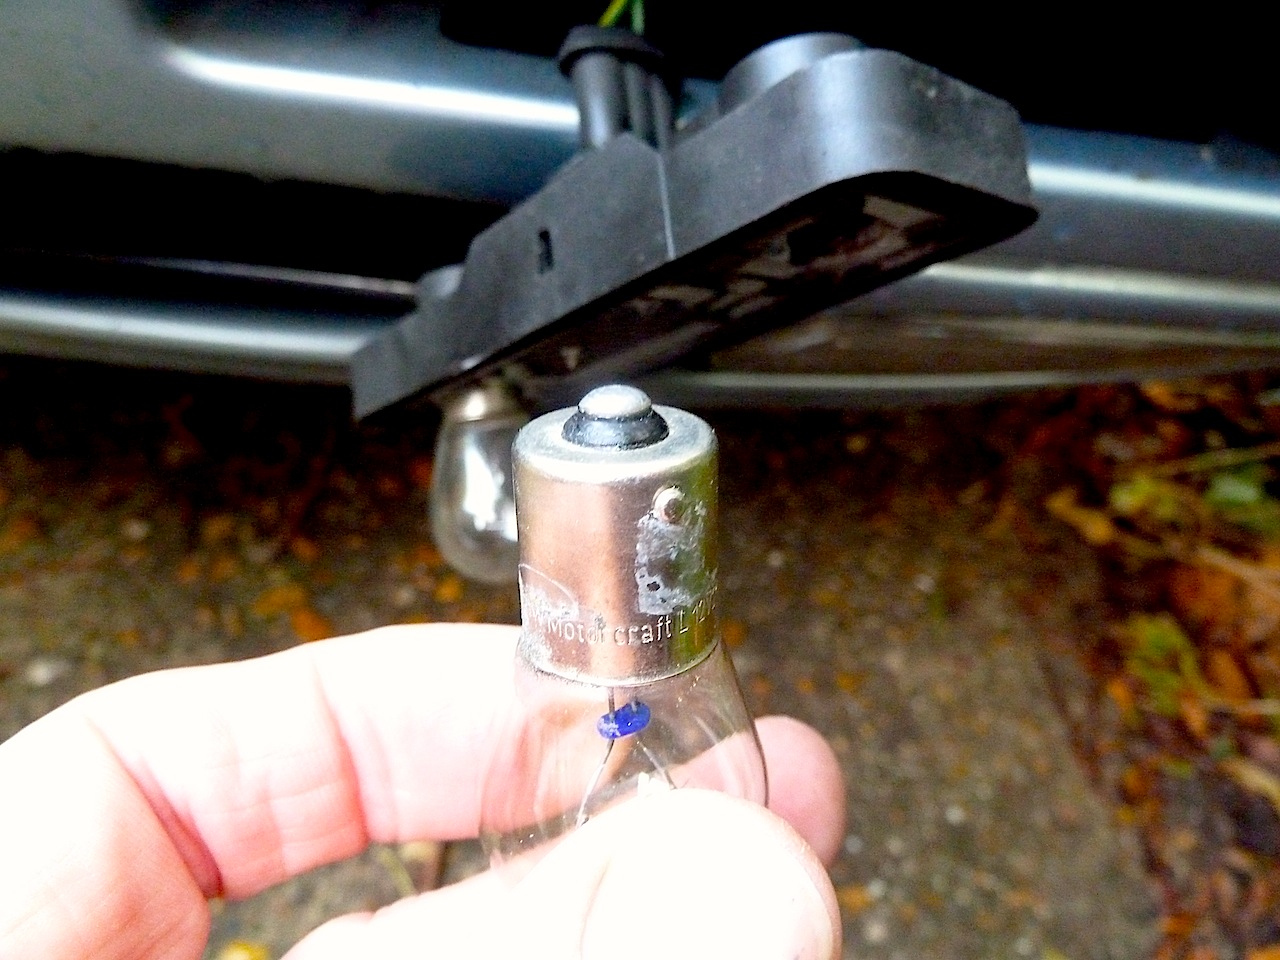
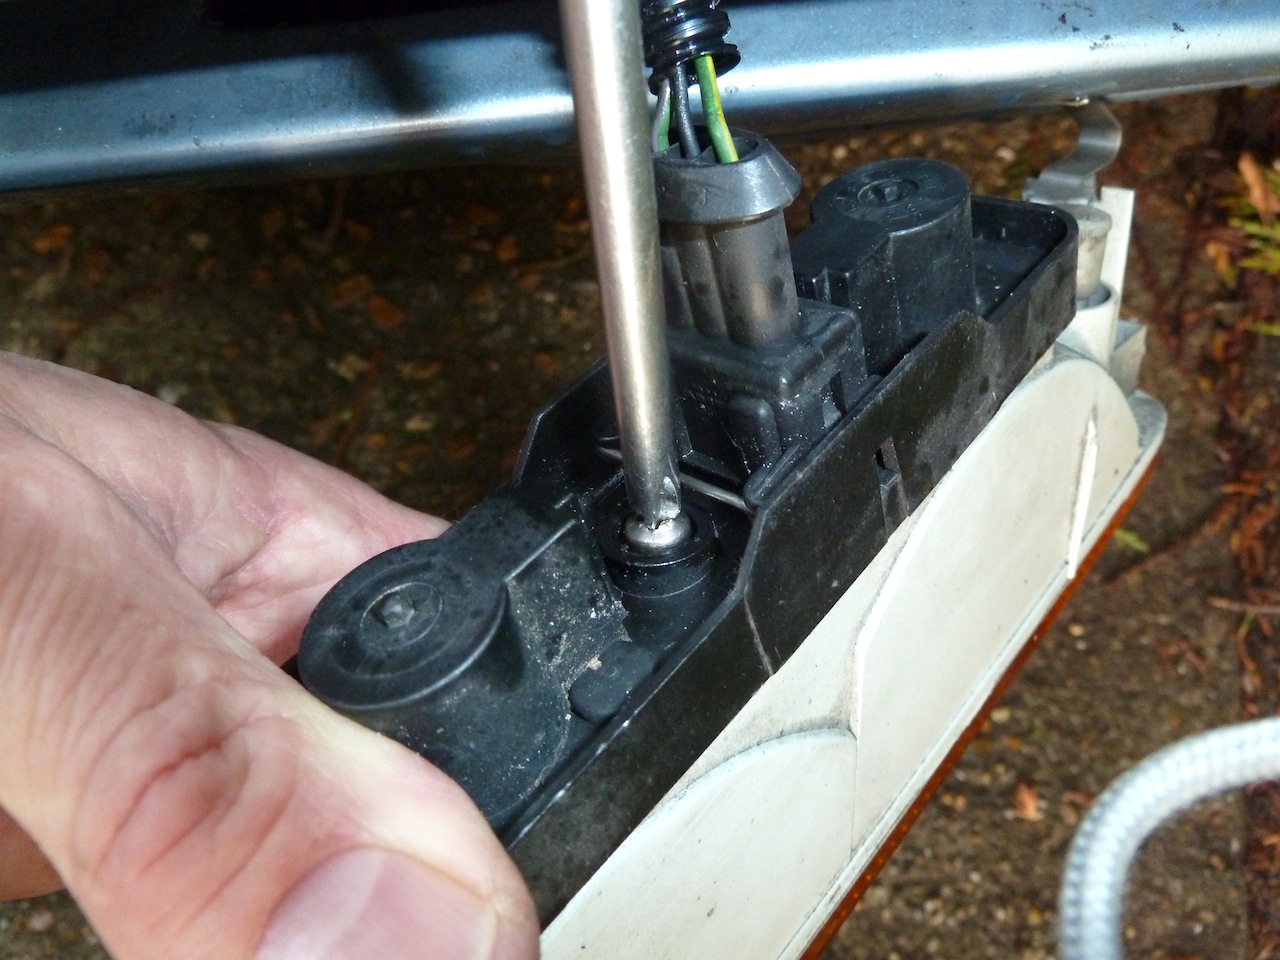
Recently I applied these techniques to an ailing indicator lamp. I needed the car concerned for a long trip at night, and just before departure, as dusk was gaining momentum, I noticed that one of the bulbs in the left-hand indicator assembly was not functioning (on this car, a Jaguar, there are two bulbs in each front indicator unit).
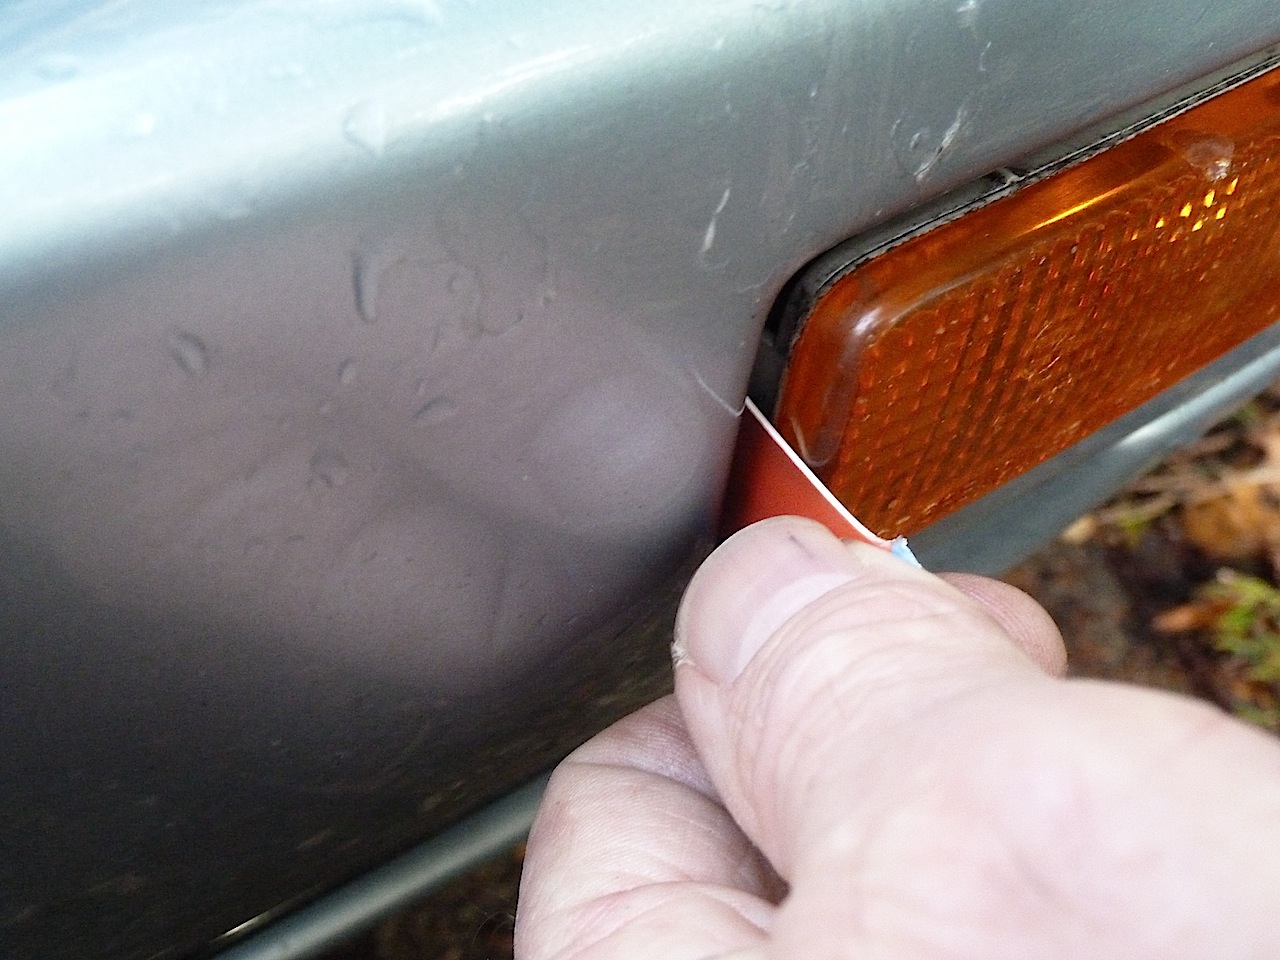
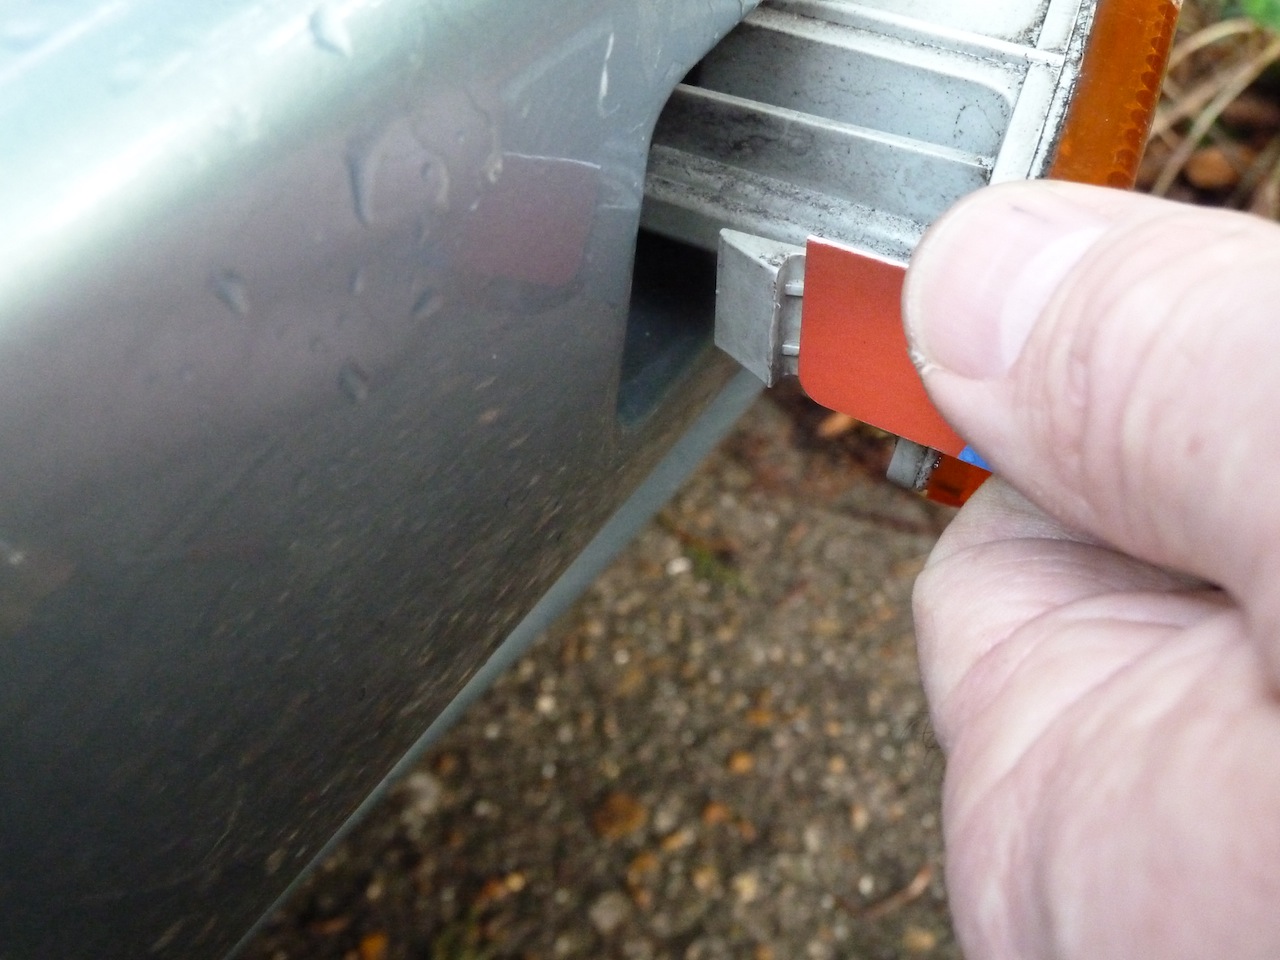
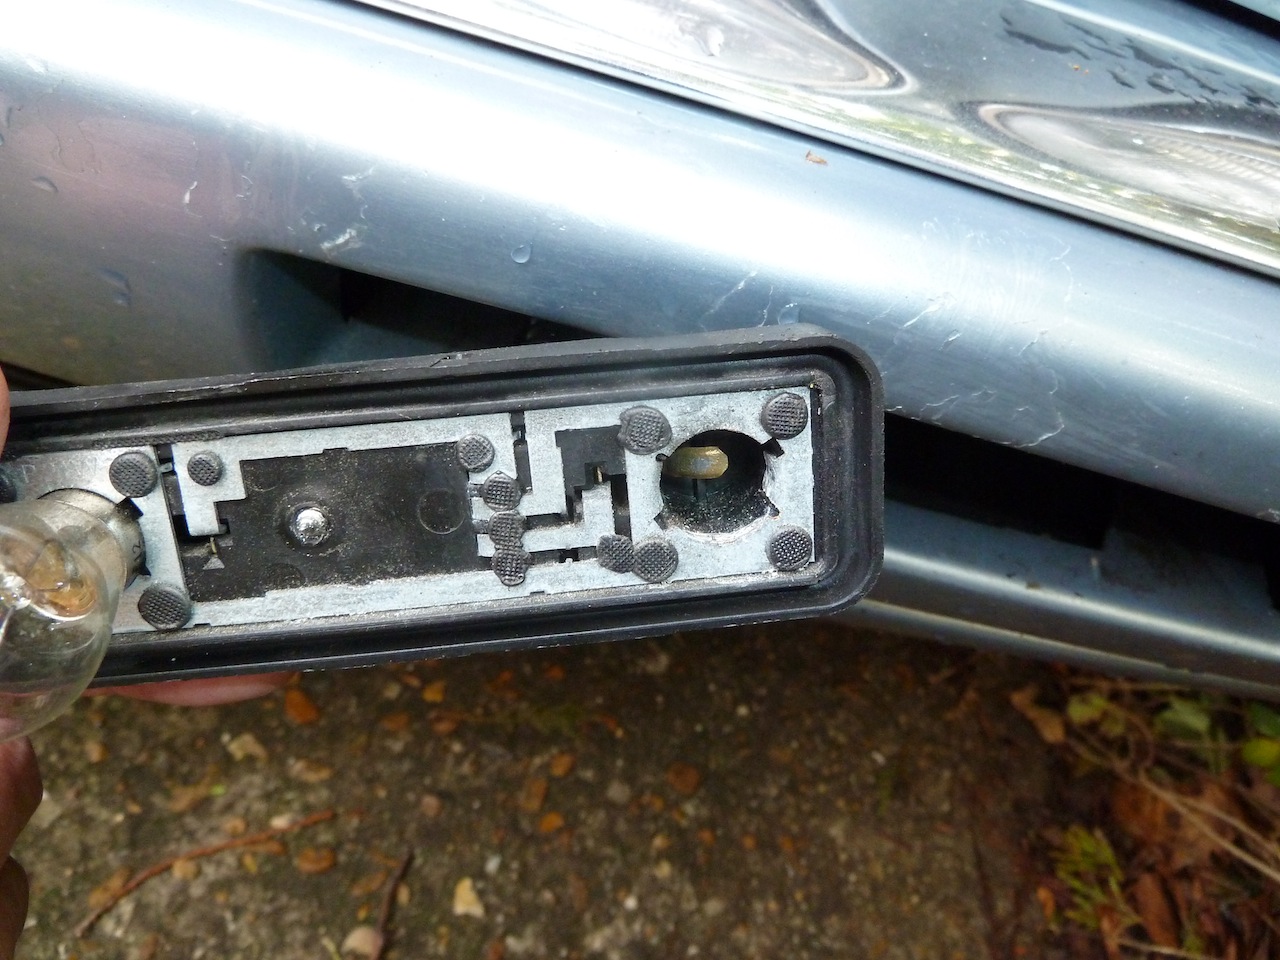
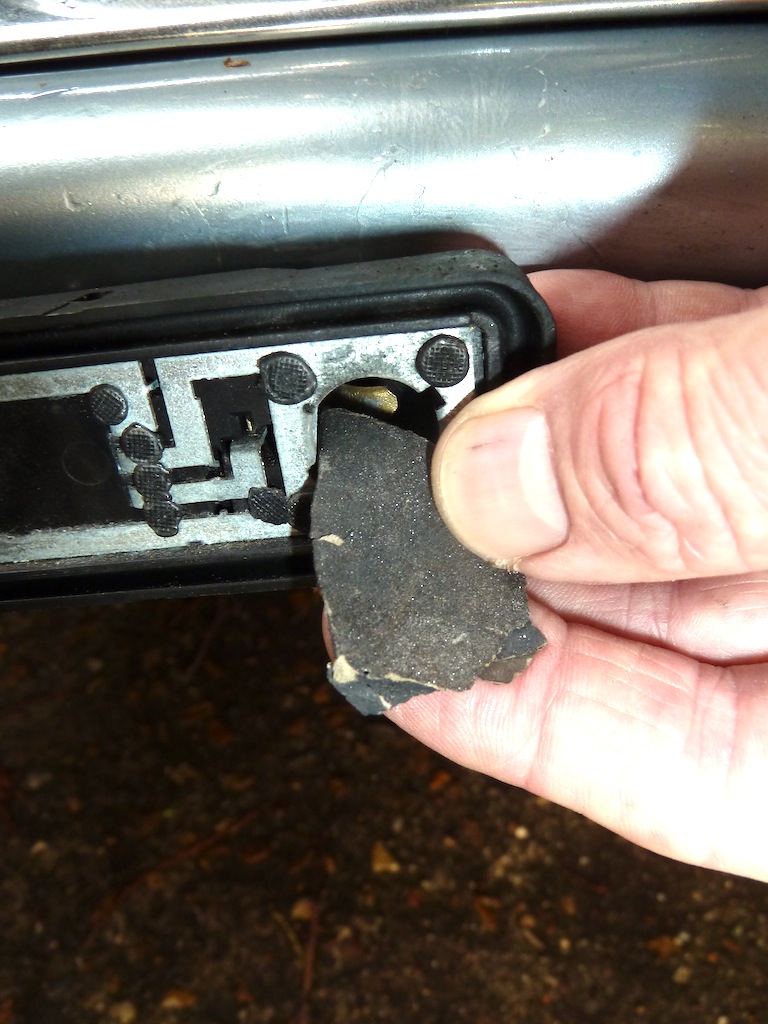
I consulted the car’s handbook, which advised that I needed a ‘special tool’ (“obtainable from my Jaguar dealer”…) to release the plastic clip holding the indicator lamp assembly to the front bumper. I improvised, using a strip cut from an old plastic card, and, once the lamp unit was out, discovered that the problem was a build-up of minor corrosion around the affected bulb and its holder.
Within a total of five minutes, without outside assistance and at virtually zero cost, I had cleaned up the bulb and holder, re-checked operation (Geronimo, it worked) re-assembled the lamp unit to the bumper and was off on my long night drive.
KIM’S USEFUL TIPS
- Stay safe and legal… Check the operation of your lamps on a daily basis, especially in winter or poor/low-light weather conditions. Some cars (like my Jaguar) feature a ‘bulb out’ warning lamp on the dashboard. If this illuminates, check all the bulbs on the car. Note that if an indicator bulb fails to illuminate, the remaining bulbs in the affected circuit may flash faster than they should, in addition to which the audible ‘clicking’ normally heard may not be operational.
- Buy a spare set of bulbs for your vehicle (available for most recent models from motor accessory shops, supermarkets, general garages or main dealers). Keep the set in the car, together with any ‘special tools’ required (such as a screwdriver or a strip of plastic; please see main text and our photographs).
- If you do remove a lamp unit, treat it, plus the various cables, connectors and bulb holder(s) with the utmost respect. My advice is… ideally don’t dismantle components unless there is a specific need to do this, especially if you need the car in a hurry. In such cases I have always found that ‘discretion is the better part of being able to drive the vehicle’!
- If a lamp unit is equipped with a weather seal or seals to keep out moisture, ensure that the these are intact and correctly positioned, to keep moisture at bay. In some cases you can apply flexible waterproof sealant (from a small tube, and obtainable from motor accessory outlets, etc.) to keep out water, but the sealant does not set ‘hard’, so does not prevent easy dismantling/remove of the lamp unit, when required.
- If you discover serious corrosion within the lamp unit, renew it, or get it changed. In this situation, or if there is a fault within the car’s wiring (etc.) that is not easily fixed, it is probably best to consult a mechanic or auto-electrician.